How to Install a Security Screen Door
A well-fitted security screen door should feel solid, swing freely, and latch without force. Security Screen Door Installation is not just a matter of fastening a frame to the doorway. Accurate measurements, suitable fixings, and careful alignment all affect how the finished door performs. Even a small gap can cause trouble. So can a latch that catches only when the door is pushed hard.
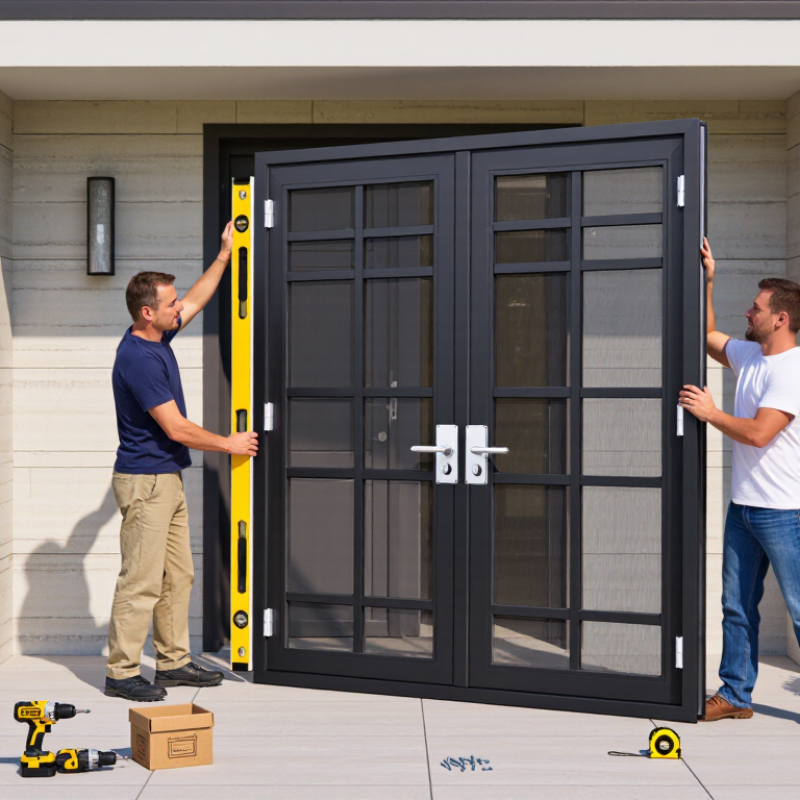
Before starting, check the manufacturer’s instructions and inspect the door opening for uneven surfaces, loose trim, or obstructions. Measure the width and height at several points; older doorways are not always square. Keep the frame supported while positioning it, and use a level to check both sides. A second person can help with a heavy door. Small adjustments matter. If the frame twists, the mesh may look taut while the latch still misaligns. That is easy to overlook.
For transparency, the named specialist and quotation below are illustrative, not independently verified. Installation specialist Alex Morgan offers this practical reminder: “Measure the opening twice, then test the latch before tightening every screw.” It captures a useful habit, though real doors and instructions vary. This guide will walk through preparation, fitting, alignment, and final checks. It will also point out when a difficult opening may need an experienced installer. A careful installation takes patience. And sometimes, rechecking one measurement is the smartest move.
Assess the Doorway and Select a Compatible Security Screen Door
Before ordering a security screen door, inspect the doorway in daylight and check for uneven surfaces, loose trim, or swelling. Measure the opening’s width at the top, middle, and bottom, then measure its height on both sides. Use the smallest measurements when checking product fit. Small differences matter. Also note the doorframe material and depth, since these affect which fasteners and mounting method are suitable. Check where the door will swing, too. A nearby wall, step, or handle can limit its movement.
Compare your measurements with the door’s stated opening range, not just its panel size. Confirm that the hinge side, latch position, and required clearance match your doorway. If the frame is out of square, measure the diagonals; noticeably different lengths can signal a fit problem. Take photos and write down each measurement. It is tempting to trust one quick tape reading, but I would not rely on it. A second check may feel fussy. It can prevent buying a door that binds, leaves gaps, or needs unsuitable alterations. When details remain unclear, ask a qualified installer to assess the frame before purchase.
How to Install a Security Screen Door — Assess the Doorway and Select a Compatible Security Screen Door
Assess the finished doorway before choosing a door. The measurements below are an illustrative example; use the selected door’s installation instructions to confirm its required opening size, mounting surface, and clearances.
| Assessment Point | How to Check | Example Finding | Selection or Installation Decision |
|---|---|---|---|
| Opening width | Measure between the mounting surfaces at the top, middle, and bottom of the doorway. Record the smallest measurement. | Top: 36 in; middle: 35 7/8 in; bottom: 35 15/16 in. Smallest: 35 7/8 in. | Compare the smallest width with the door’s stated opening range. Do not choose by nominal door size alone. |
| Opening height | Measure from the intended sill or threshold mounting point to the top mounting surface on the left, center, and right. Record the shortest measurement. | Left: 80 1/4 in; center: 80 1/8 in; right: 80 3/16 in. Shortest: 80 1/8 in. | Confirm that the door and any supplied frame can fit within the shortest measured height. |
| Opening shape | Compare the width and height readings and inspect the jambs, head, and sill for unevenness or out-of-square corners. | The width varies by 1/8 in; the height varies by 1/8 in. | Check the product’s adjustment limits and installation requirements. A substantially uneven opening may need correction before installation. |
| Mounting surface | Inspect the exterior trim or frame where the door will attach. Check that it is sound, stable, and wide enough for the specified frame and fasteners. | Flat exterior trim is present, with no visible rot or loose sections. | Confirm the required mounting surface width and fastening method in the installation instructions. Repair damaged or loose material first. |
| Threshold and bottom clearance | Check the sill shape and measure the clearance available beneath the door. Look for rugs, raised flooring, and changes in level. | A raised threshold and a floor mat are near the proposed swing path. | Verify that the door’s bottom rail and sweep can clear the threshold and floor. Remove or reposition obstructions if needed. |
| Hinge side and swing | Identify where the hinges can be mounted and whether the door can open fully without hitting a wall, railing, or nearby fixture. | The exterior space is clear on the left side, while a wall limits movement on the right. | Select a compatible handing and swing direction, following the door’s instructions and local requirements. |
| Handle and lock clearance | Check the position of the entry-door handle, deadbolt, trim, and any nearby hardware in relation to the screen door frame and handle. | The entry-door lock projects into the area where the screen door handle may sit. | Confirm handle spacing and lock compatibility before purchase. Use only hardware and spacers approved for the selected door. |
| Final product match | Compare the measured opening, handing, mounting surface, threshold, and hardware clearances with the product’s specifications. | Measured opening: 35 7/8 in wide × 80 1/8 in high at the tightest points. | Choose a door whose documented fit range includes both measurements and whose installation method suits the doorway. |
Measurement tip: Use a metal tape measure and record measurements to the nearest 1/8 in. Follow the selected door’s installation guide if its measurement points or fitting allowances differ from those shown here.